

How To Creat Psd Templates Easily
How To Make A Collage In Photoshop
Making a photo collage is a fun way to share a whole agglomeration of images in one place. Whether yous just got dorsum from vacation or want to share memories from a family outcome, collages make it piece of cake to showcase all the highlights. Creating a collage in Photoshop is very straightforward and doesn't require a whole lot of Photoshop noesis to get the task done.
The downside, however, is that creating a collage can exist fourth dimension consuming and fickle. That'south why learning how to make a collage template in Photoshop is one of the all-time means to go about creating a new collage. Rather than starting from scratch every time, you simply have to drag and drop your images into place!
To Make A Collage Template In Photoshop, You lot Need To:
- Create A New Layer And Fill It With Color
- Resize And Duplicate This Layer To Form A Collage Pattern
- Add A Clipping Mask To Restrict Your Photo To Fit Into Each Detail Shape
- Create A New Clipping Mask For Every Paradigm Until Everything Has An Assigned Shape
- Consign Your Collage Template As A PSD File To Piece of work With Later On
That might all seem a piddling overwhelming at get-go, but I promise this whole process is a cakewalk. Let's dive into how to create your very own collage template in Photoshop.
Does Photoshop Take Collage Templates?
Before you begin, yous might exist wondering if Photoshop has any collage templates congenital-in. Unfortunately, there aren't whatever templates that come with Photoshop, but there are tons available online for gratuitous.
In fact, yous can get started with these five free collage templates to make your life a lot easier. Only make certain to continue through the steps below so y'all empathise how they work!
How To Brand Your Own Collage Templates
Collage templates save then much time that y'all'll wonder why you ever thought of working without i. Since a collage requires you to brand a series of shapes over and over, why suffer through doing the whole process more than once?
With a template, you can create a drag and driblet collage that will piece of work perfectly for whatsoever collage you desire to create in the time to come.
In the steps below, we'll go over how to make a unproblematic iii×three grid collage. You can interchange these square shapes with other shapes every bit you wish.
For now, let'southward stick to the basics and create a nice and simple collage template that will piece of work perfectly for any collage thought you have.
Step 1: Batch Import Your Images
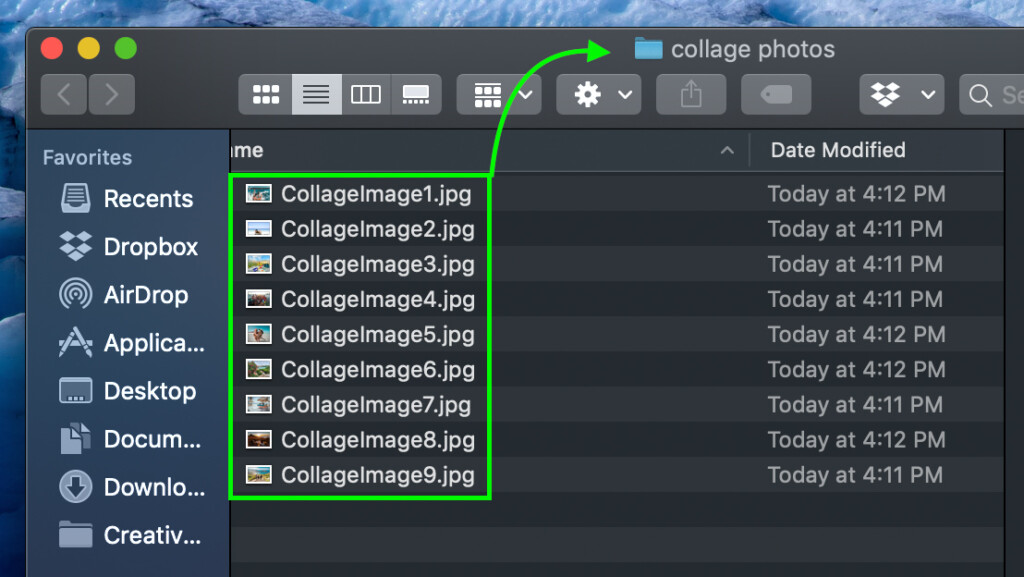
Before y'all import your images, make life easy on yourself, and grouping all of your photos into one folder on your computer. Rather than sort through unlike folders and hard drives, do the work beforehand and put them in one place.
Past doing this, you tin import all of your collage pictures at once to save time.
Subsequently making your collage image folder, create a new Photoshop document (Command/Command + N) in the desired dimensions of your collage. For this example, I'll make a square document of 2000×2000 pixels at 300PPI.
Ensuring y'all have a college resolution (PPI) will improve the prototype quality if yous decide to impress your collage.
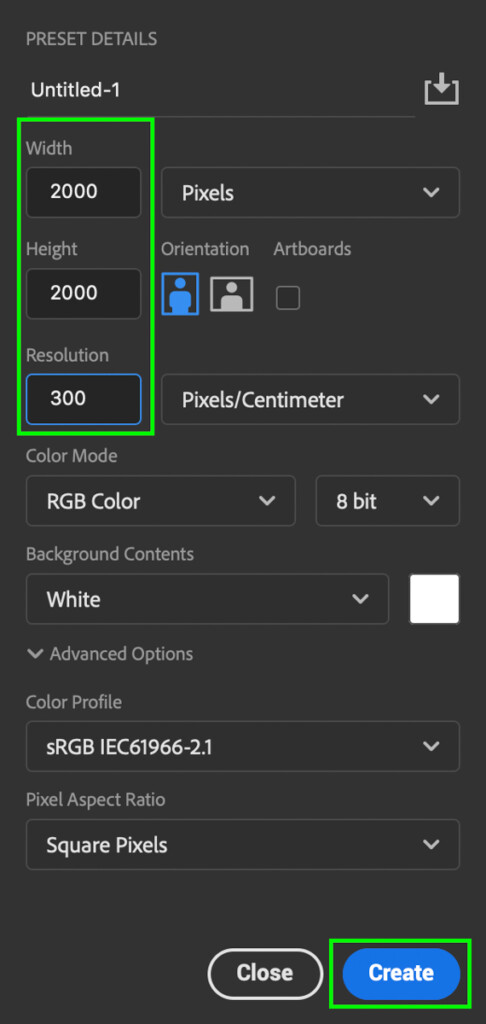
Click create to open up your new document into Photoshop.
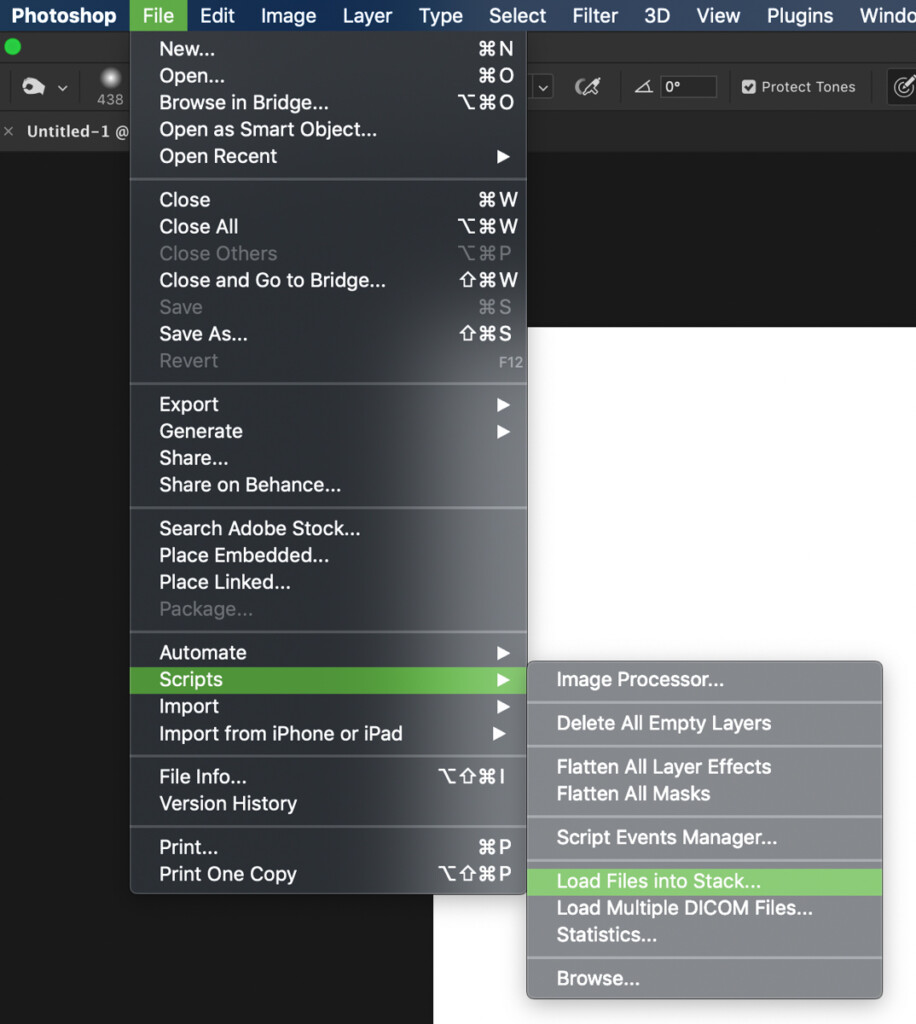
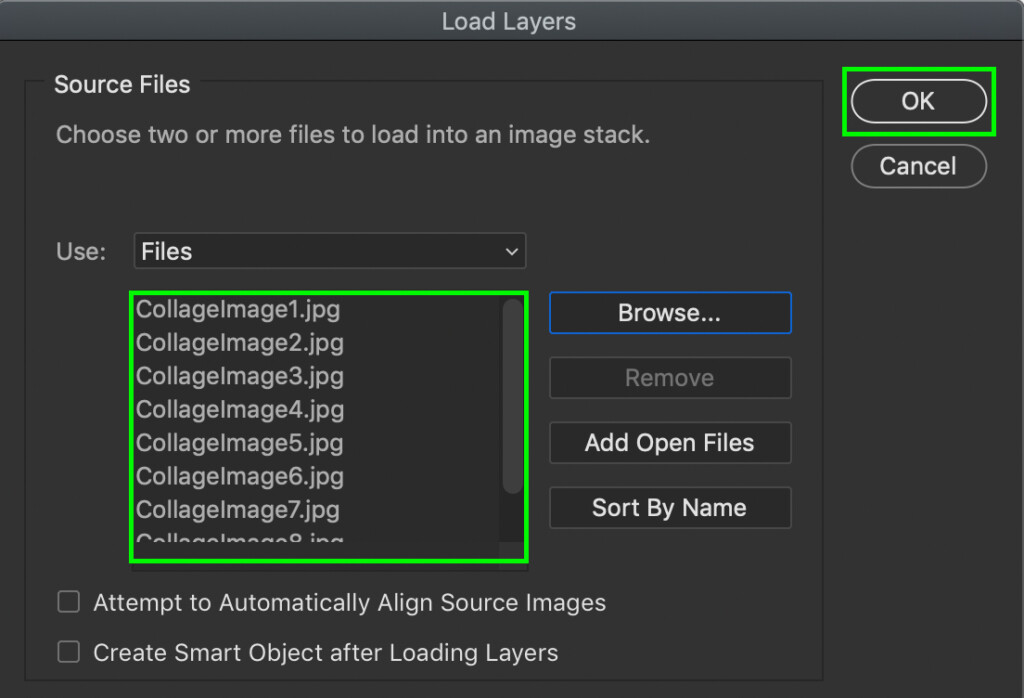
Now it'southward time to import your photos. Rather than doing them each individually (because who wants to spend the time), permit'south import them all together. Just become up to File > Scripts > Load Files Into Stack.
In the new dialogue box, click Browse and locate the photos for your collage on your computer. This should be easy since you put them all in a dedicated collage folder beforehand!
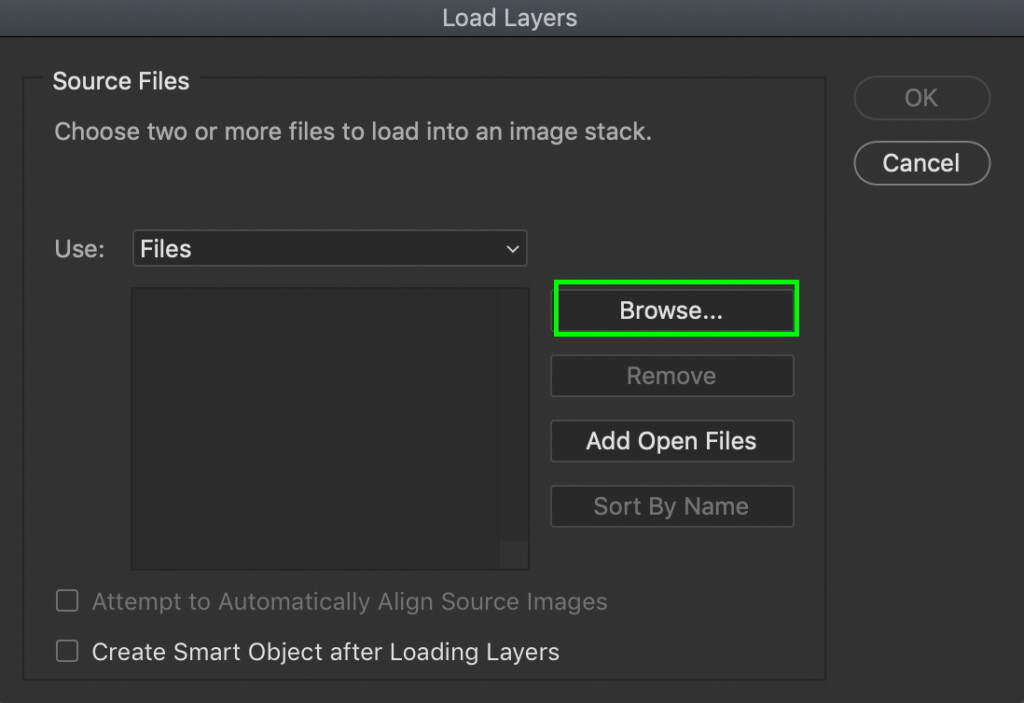
Double checking that your files are listed in the file menu, click ok to brainstorm importing your photos.
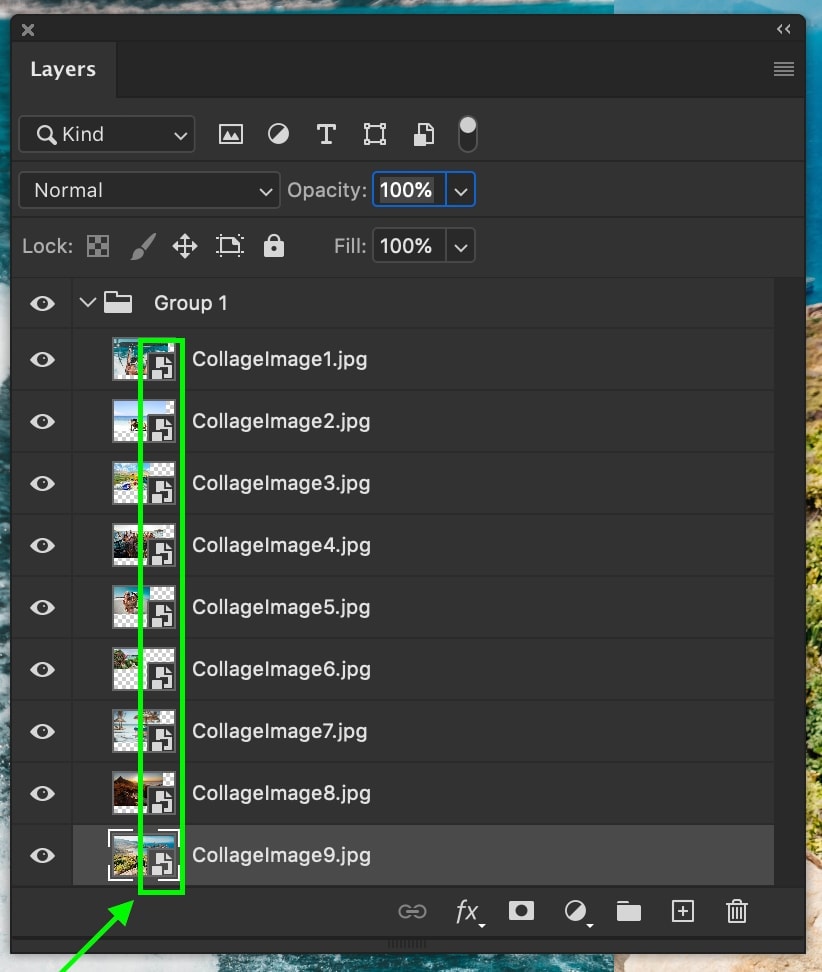
All of the selected photos will load into their own project every bit individual files. After they finish importing, hold shift and click between your top and bottom layers to select them all at once.
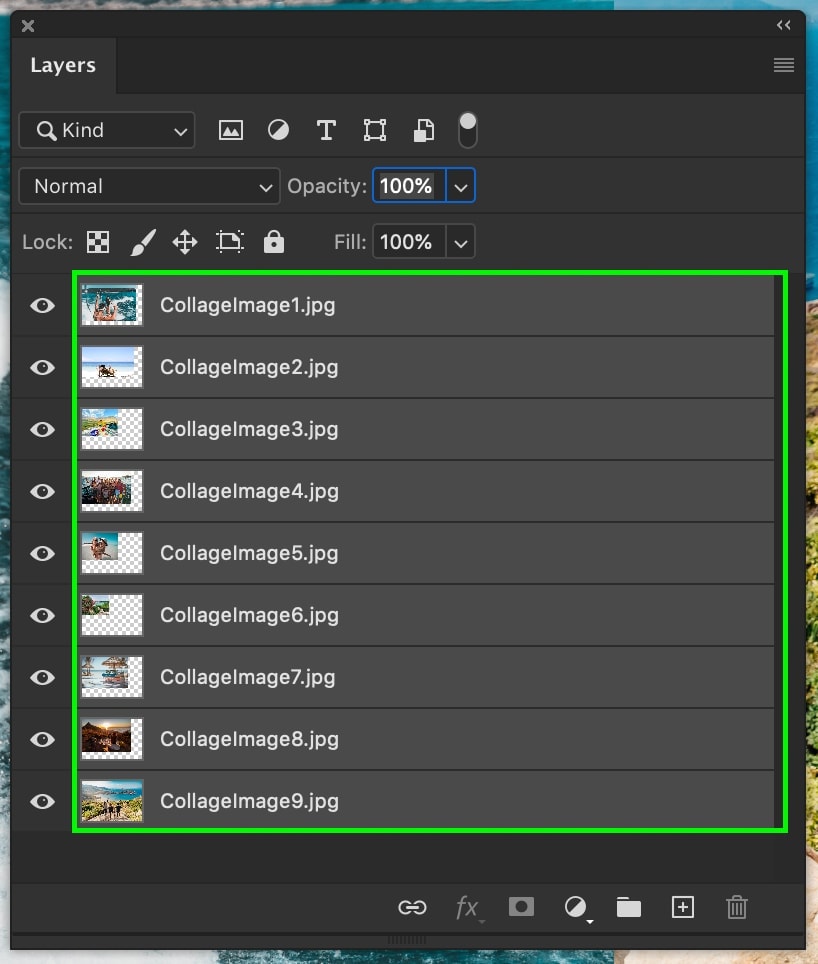
Side by side, create a group by pressing Control + Chiliad (Mac) or Command + G (PC). This will make information technology easier to move your pictures into your collage template afterwards on.
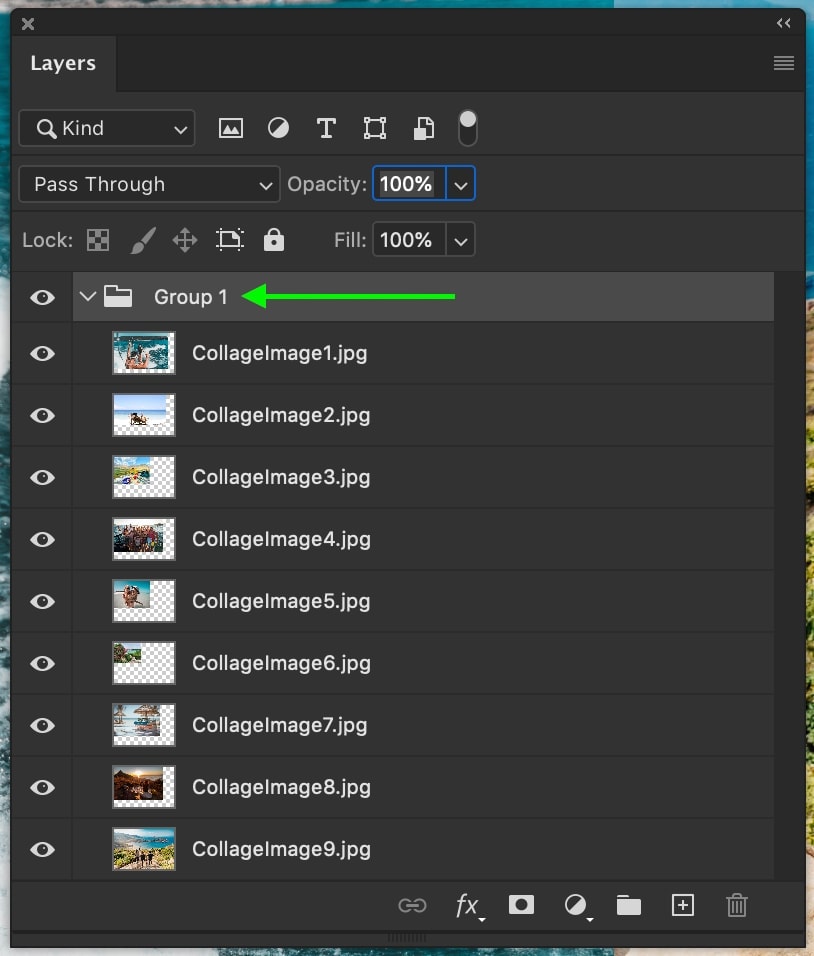
Next, going through each prototype in your group individually, right-click on the layer and become to Catechumen To Smart Object.
Turning each layer into a smart object gives yous the ability to rescale your images without any quality loss. This volition be very important once you start putting photos into the collage! More on that later.
For now, nosotros're done with the images and are going to start creating the collage template.
Click on your collage tab to switch to your other Photoshop window.

Step 2: Create A Filigree Template For Your Collage
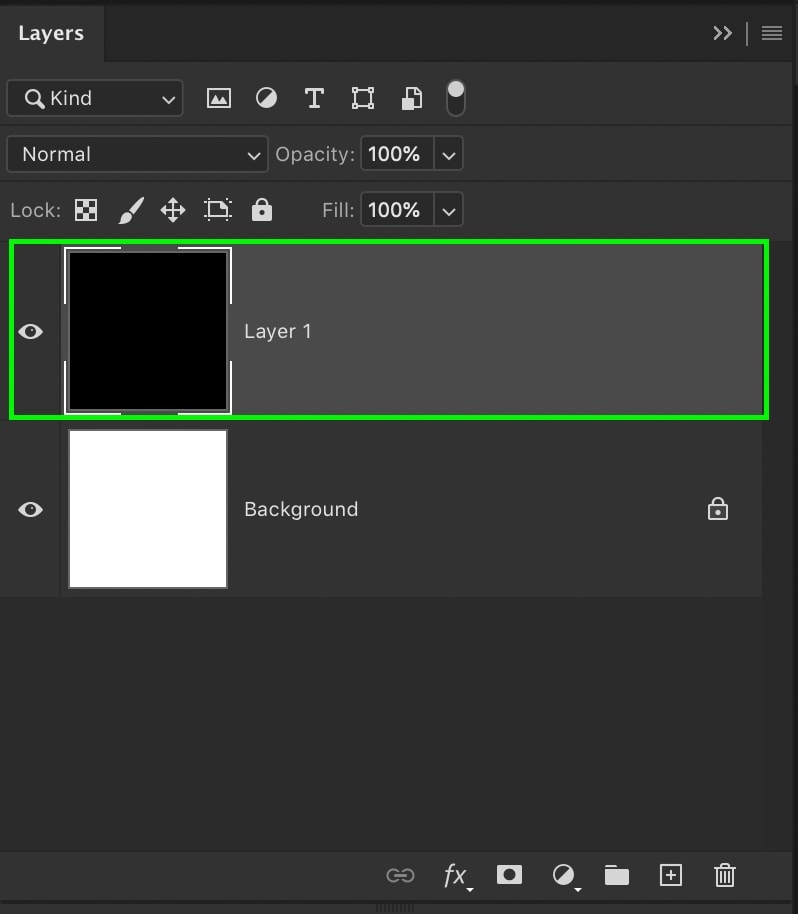
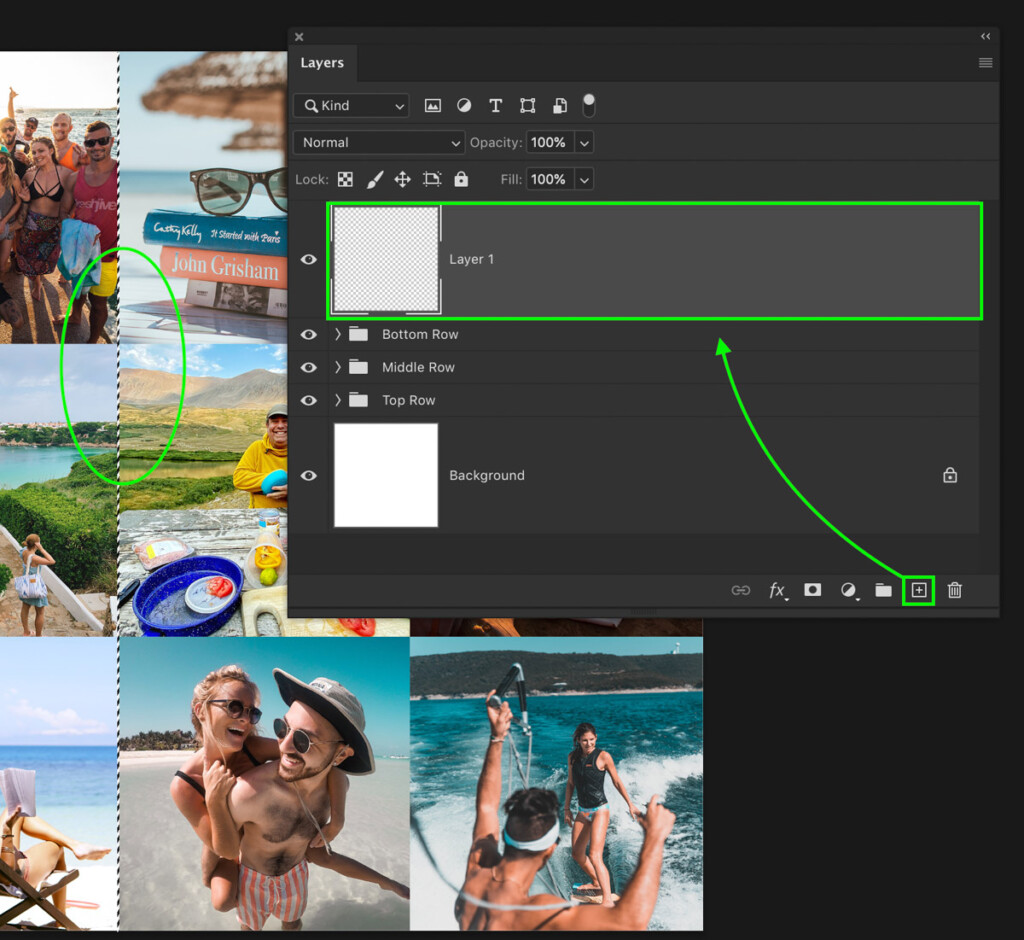
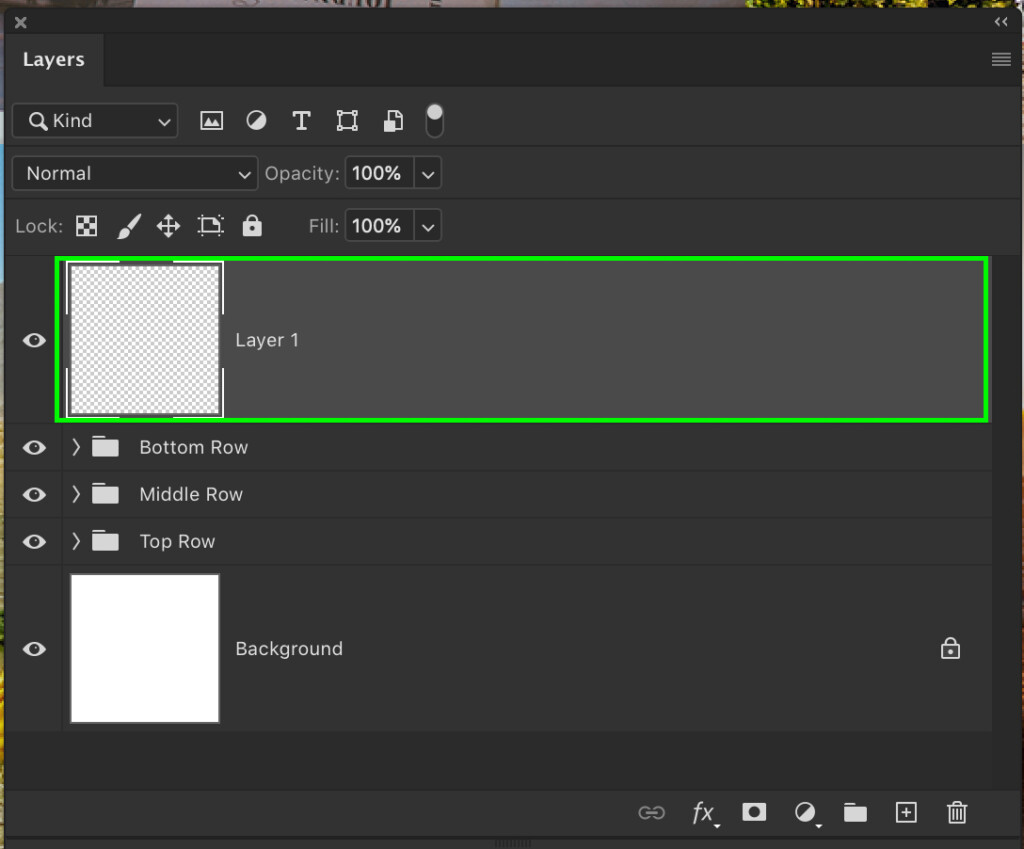
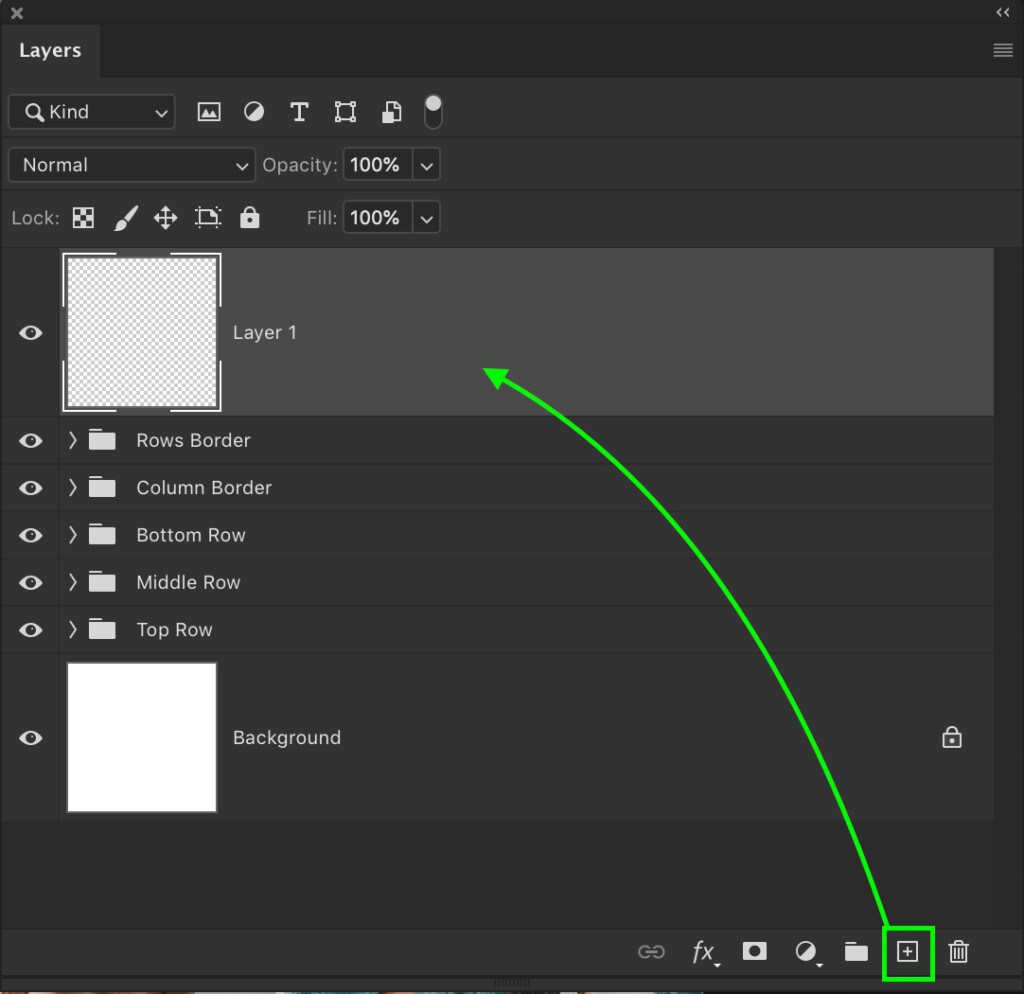
Permit'south start to create a template for the collage by start creating a new layer. Just click on the new layer icon at the bottom of the layers panel.

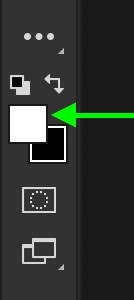
With the new layer selected, set your foreground color to black (or any other color besides white) and press Selection + Delete (Mac) or Alt + Delete (PC) to fill the layer with colour.

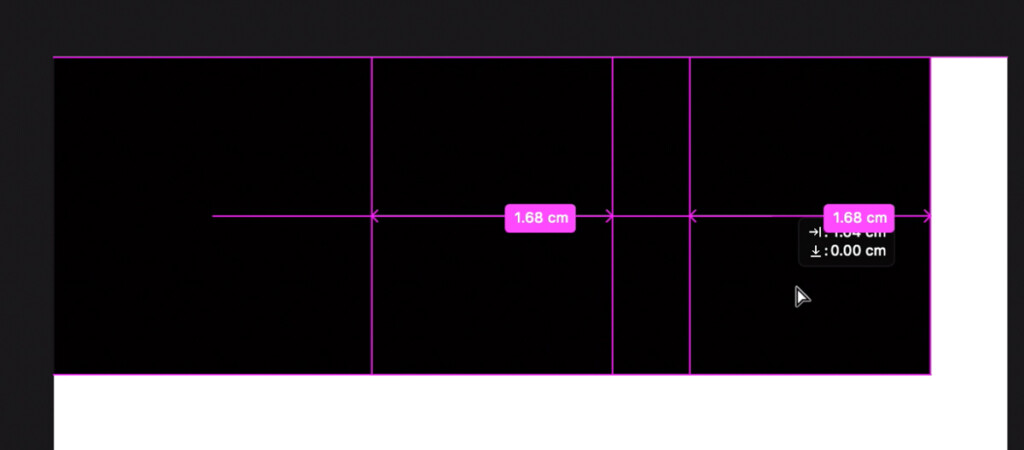
To rescale the layer to fit the three×3 grid collage nosotros will create, press Command + T (Mac) or Control + T (PC) to access your transform tool.
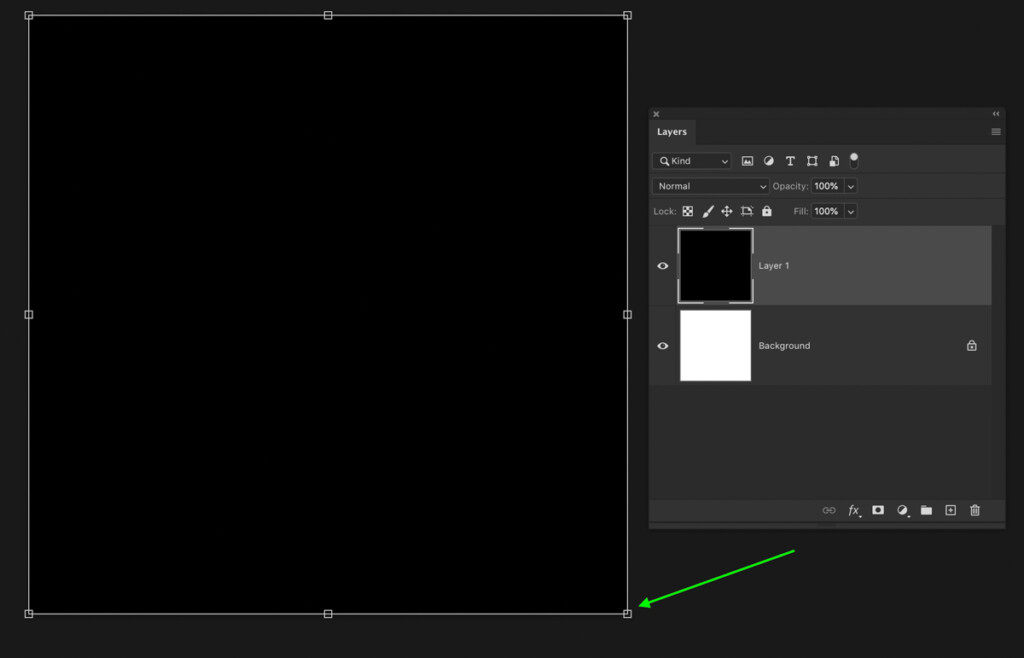
Going to the upper settings bar, make certain your reference point location is checked off, then set the location to the top left corner. The white dot on the reference point icon will shift to this upper left corner forth with the anchor point on your transform tool.

Since I desire to divide each row into 3 images, I'll change the per centum value to 33.33%. Depending on how many photos yous desire per row, this percent value will change.
Only split up 100 by the number of photos you want in a row to requite you lot the correct percent value to use.

At present your shape will resize to the upper left according to the specific percent value. Printing enter to commit to your changes.
This square is going to be what you use equally the template for each paradigm in the collage. Since you need a new foursquare for every photo, information technology'due south time to duplicate and motion this square to fill out the collage.
The easiest way to do this is past holding Alt or Choice (PC/Mac), then clicking and dragging on the shape. This will automatically duplicate and motility the layer at the same time.
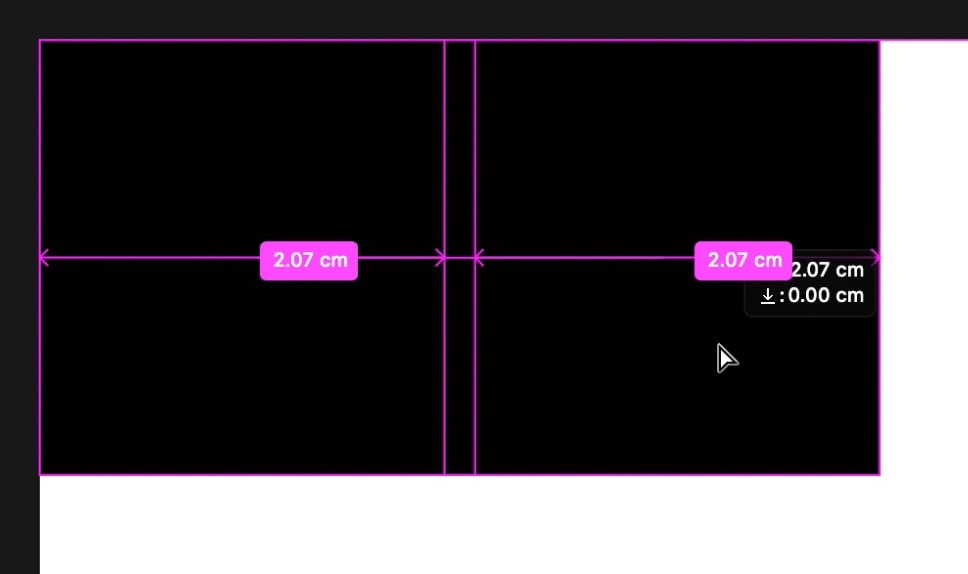
Repeat this process twice until three individual squares fill in the entire row.
In some cases, sure document sizes tin leave you will small gaps betwixt shapes. To get rid of these, select a layer with the Move tool (V) and use the pointer keys to nudge the layer into position.
If y'all're still struggling to eliminate the white gap, you tin can slightly resize the shape to better fit. While withal using the move tool (V), hold shift and elevate out the border you desire to brand larger. It volition resize itself and snap to the edge of your canvas or other shapes.
Since it'due south simply adding a few pixels to the shape, you won't notice the size difference in your overall collage.
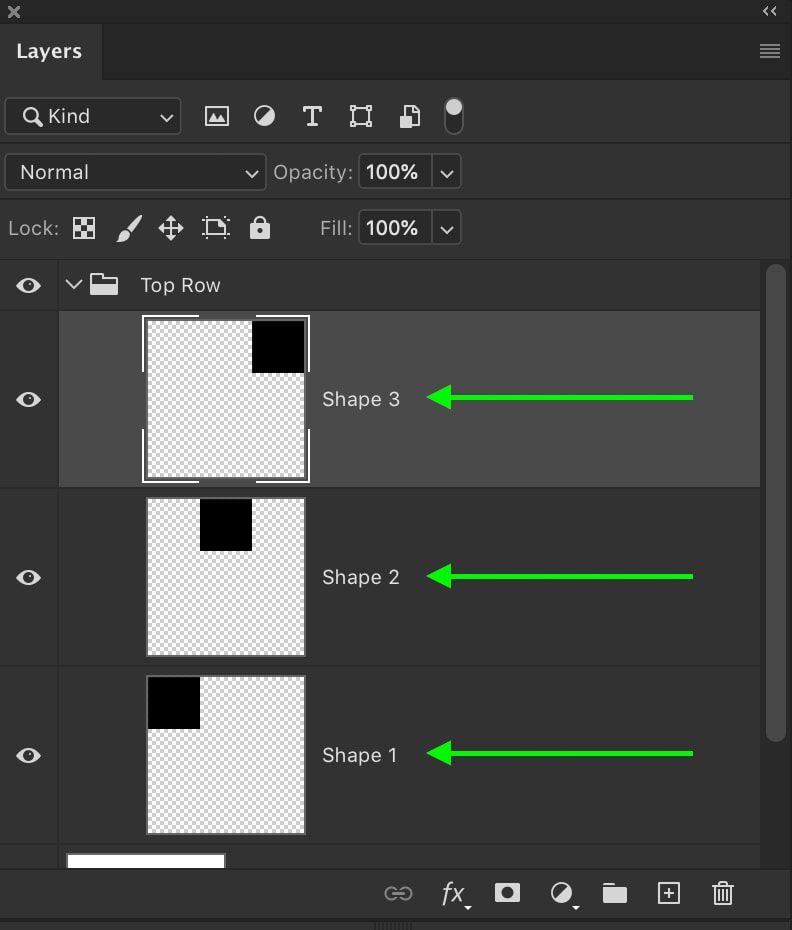
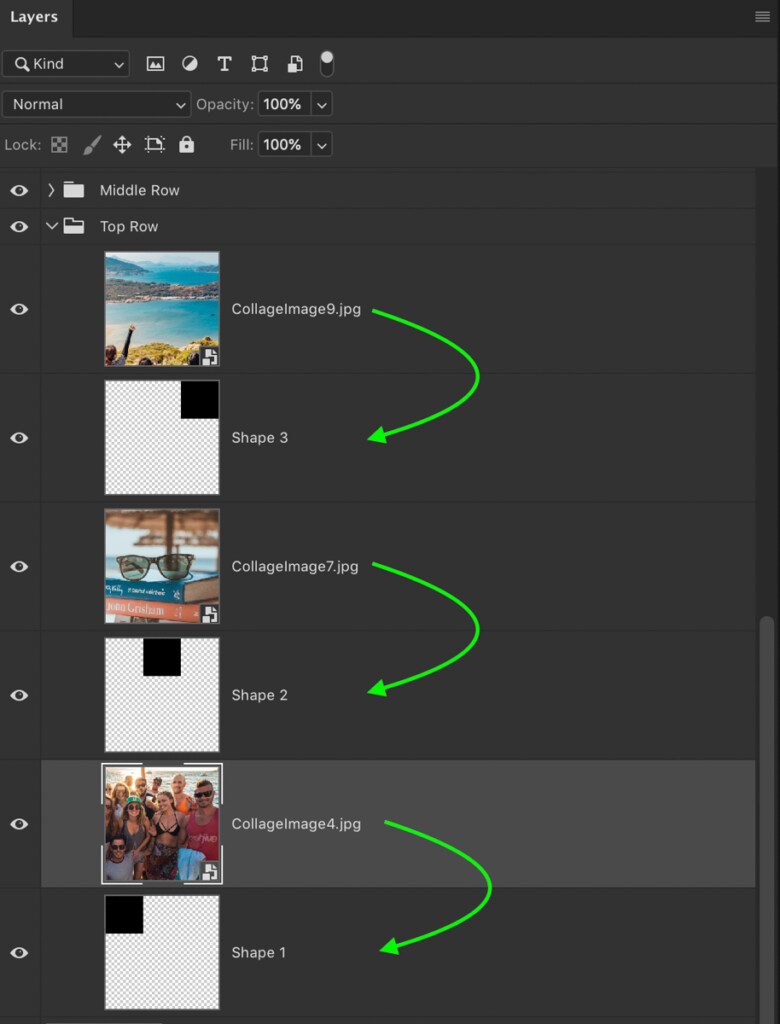
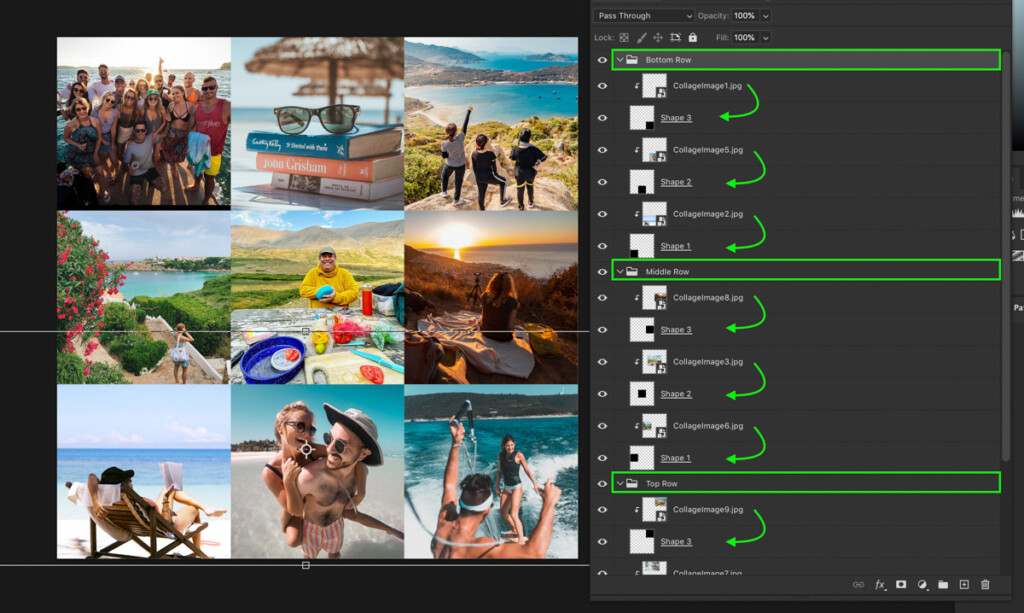
– Organizing The Image Row
Things tin can go very confusing if you don't properly organize your collage templates. The way I've found to piece of work best for this is to group each row.
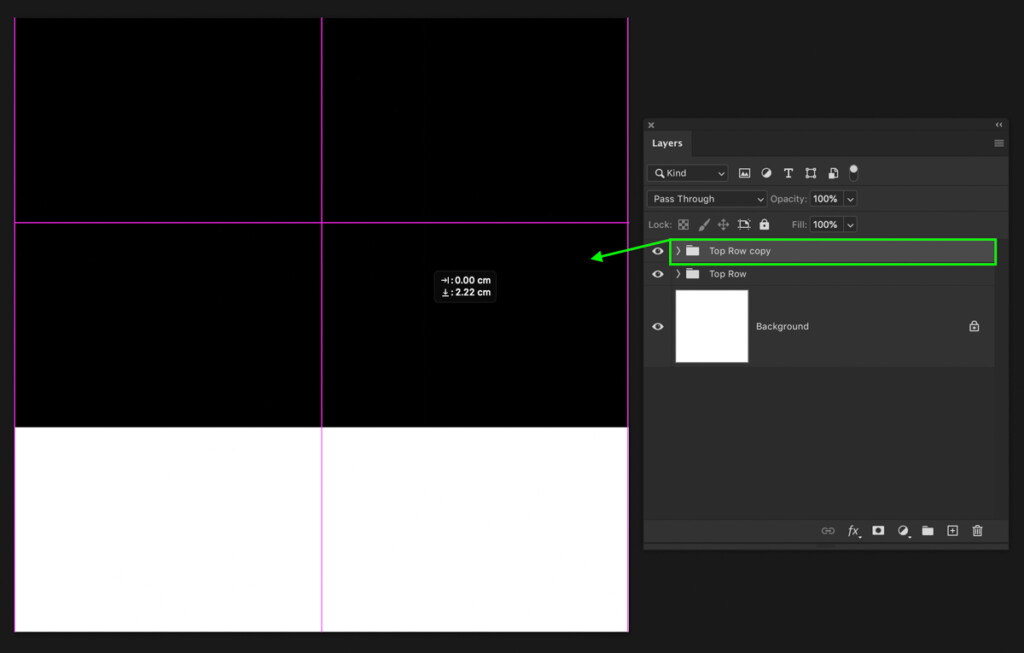
Shift-clicking all three of the square layers to select them, printing Command + G (Mac) or Control + G (PC) to group them. Rename this group to "Top Row".
Inside of the group, I'll then rename each square as Shape 1, 2, and three based on their position going left to right. This is a lifesaver when yous kickoff dealing with many rows in a collage.
– Duplicating The First Row To Complete The Template
At present that you lot've successfully created a unmarried row of the collage template, the hard work is over. Now you can only duplicate this row to create your middle and bottom row of this grid collage.
With your top row group selected, press Control + J (Mac) or Command + J (PC) to indistinguishable the group.
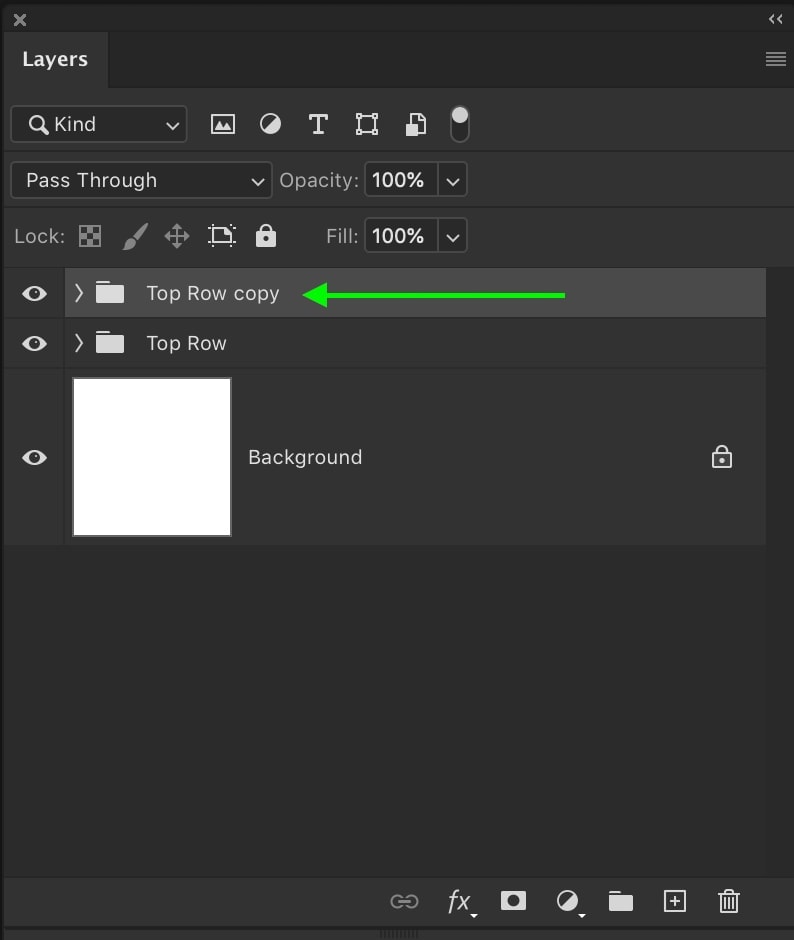
Take hold of the Move Tool past pressing Five and drag down the row until it fits in the center of your sheet.
Rename this duplicated group to "Middle Row."
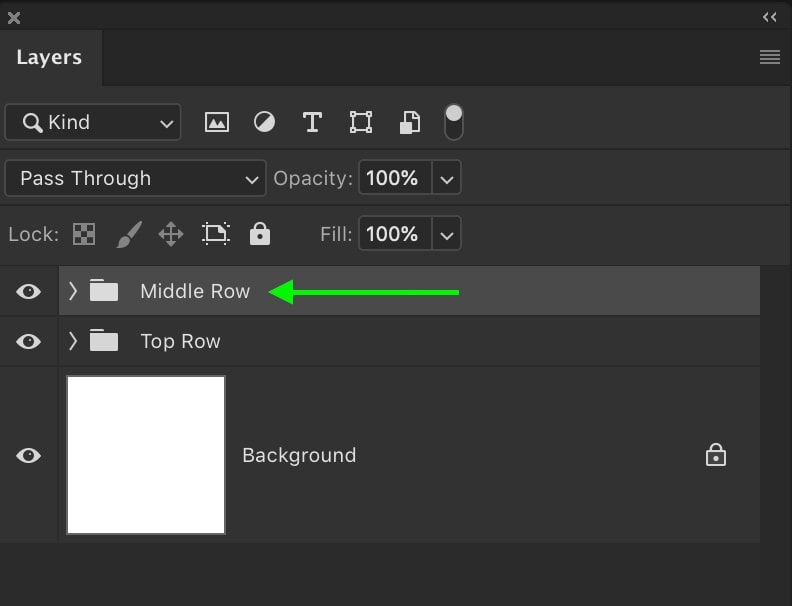
Repeat this procedure with your middle row, pressing Control + J (Mac) or Control + J (PC) to duplicate the group them using the move tool to position it at the lesser.
Rename this final grouping, "Bottom Row."

If you notice whatsoever gaps betwixt each row, once again, use your arrow keys to nudge the unabridged row with the group selected. If you nevertheless can't become rid of them, use the Move Tool (Five), hold shift, and elevate out the edge, you need to extend.
Just as with the layers, the small amount of size deviation won't be noticeable in your Photoshop collage.
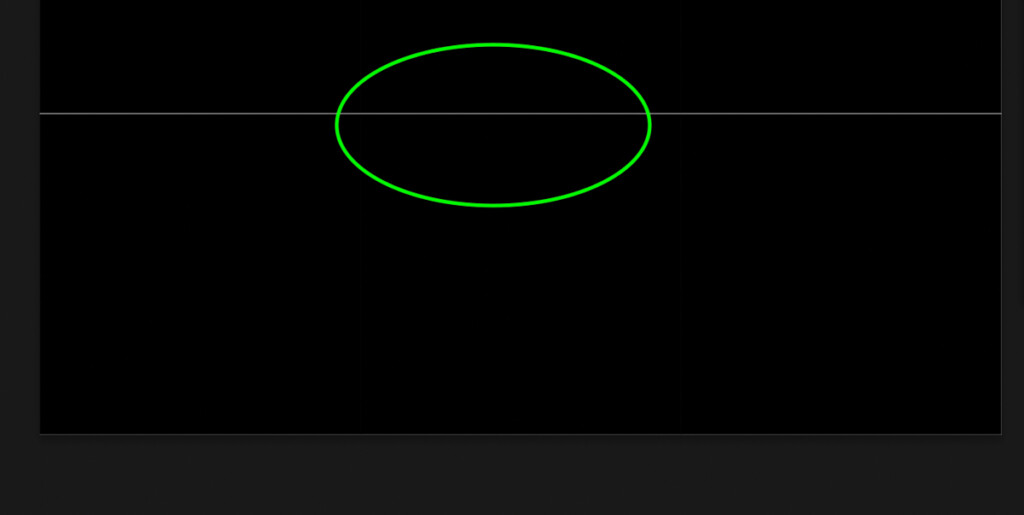
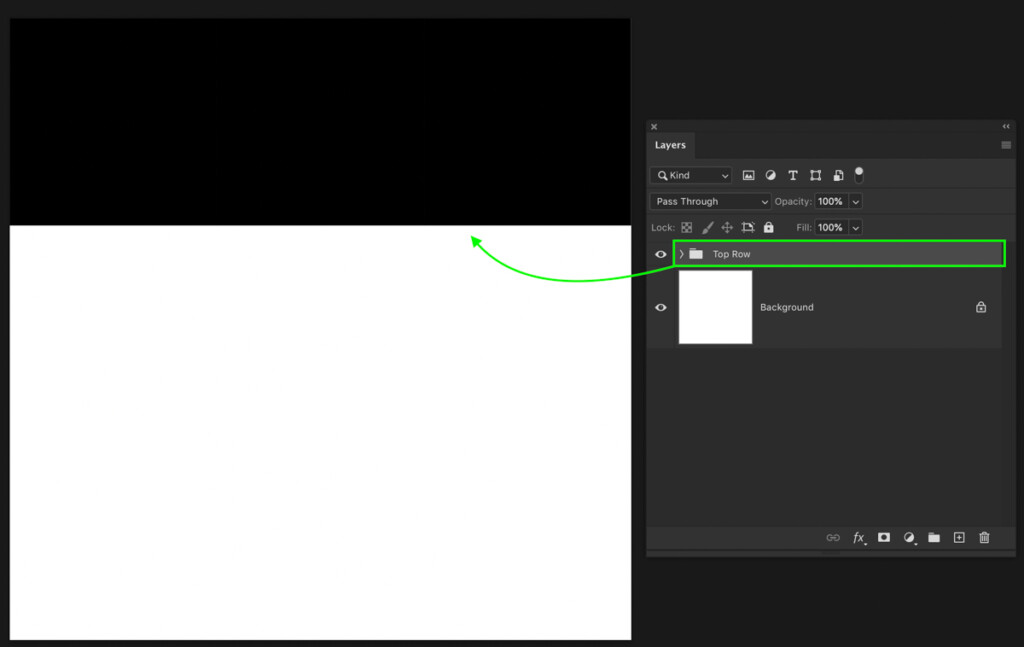
White space between rows

White space filled by nudging the row with the arrow keys.
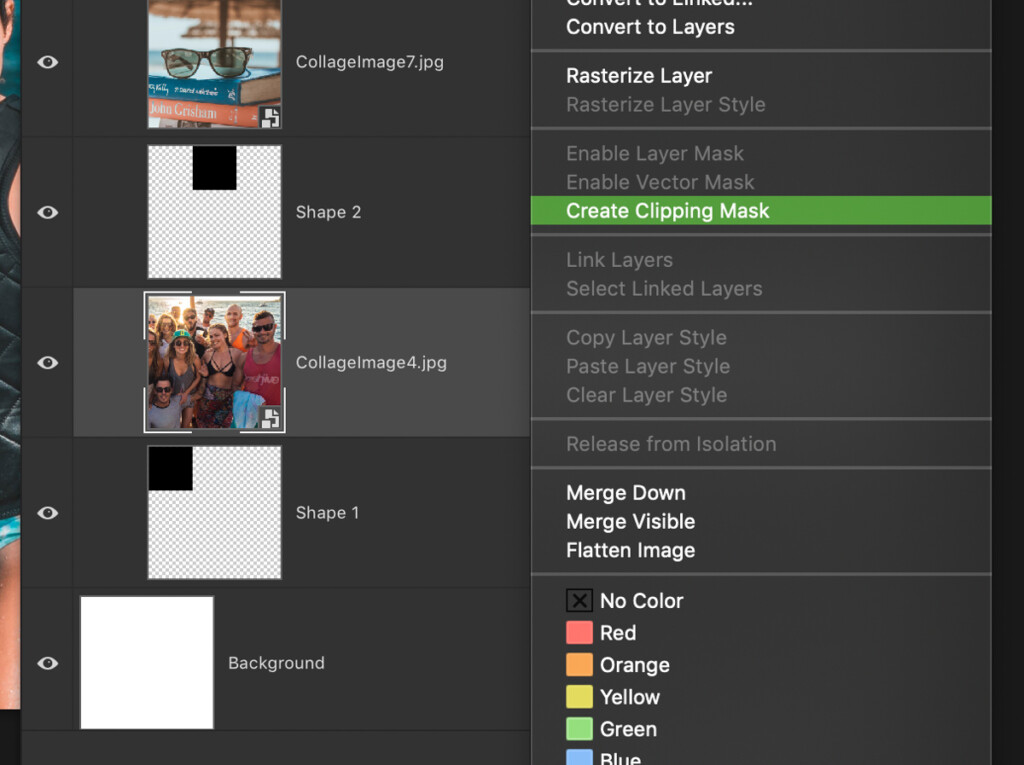
Step 3: Clip Your Images To The Shapes Of Each Row
At present the fun begins, and you can start calculation photos to your collage template! Switching windows to find your images, select the Movement Tool (V), and click on the group layer.
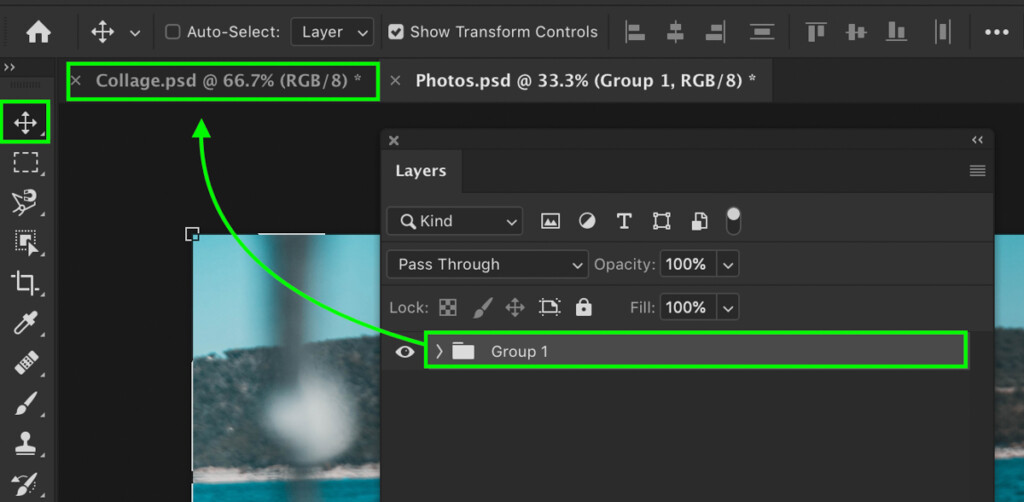
Next, click and drag this group up to the other tab to bring information technology into your collage template. Permit become of your cursor while hovering over the collage template. All your photos volition now be in the same project as your template.
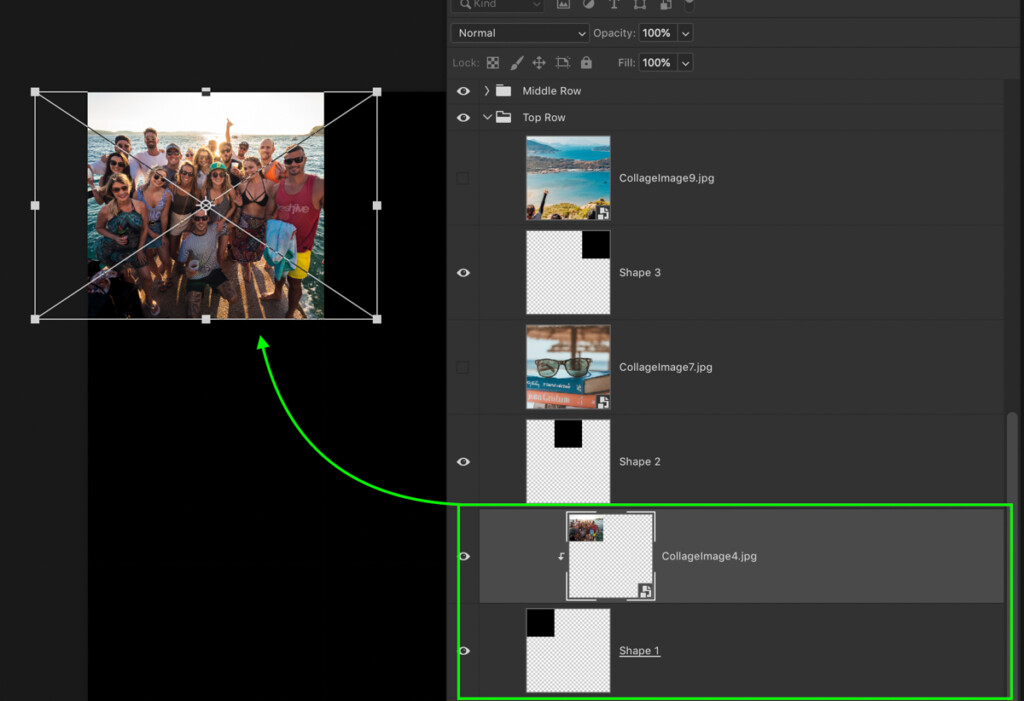
All that's left now is to make up one's mind which image you want to put in each row. Starting with the upper row, drag and drop your images into the different groups you lot desire them to be shown in. For example, I've chosen iii images to identify in my upper row of the collage and accept placed each image to a higher place its own shape.
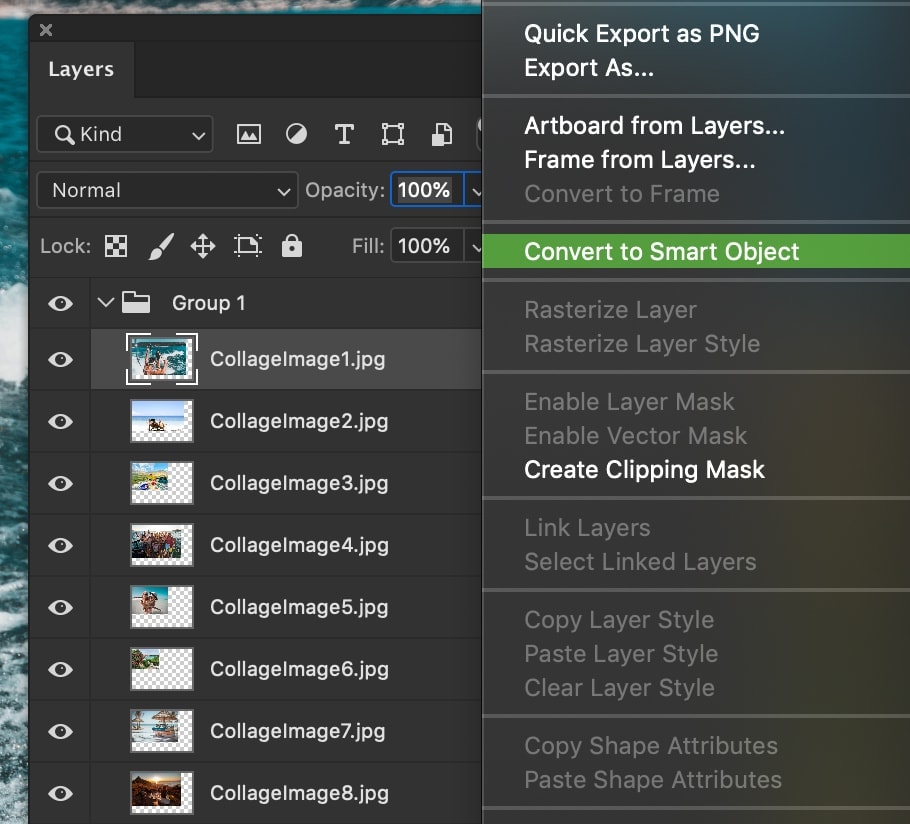
Since you desire your photos to be confined to the shape'south size and location, you need to create a clipping mask. Ensuring your image layer is direct above the shape yous want it to be displayed in, right-click on the image layer and select "Create Clipping Mask."
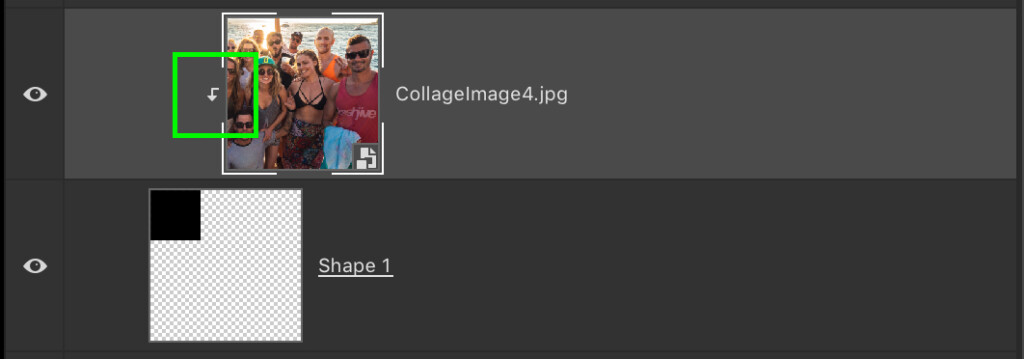
Now your photo will only be visible inside of the shape it's been clipped to. You can use the Move Tool (V) to rescale and position the image to amend fit within the shape. Since the paradigm layer is a smart object, you can calibration it up or downwardly without having any quality loss!
Rinse and repeat this process until all of your photos are clipped to their own shape. Now your collage is consummate!
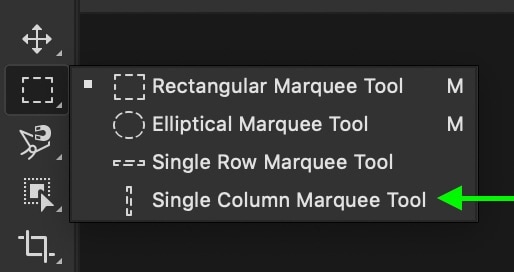
Footstep iv: Adding Lines Between Images In The Collage
For a trivial more artistic flair, you might consider adding borders between the images. Ane of the easiest ways to do that is with the unmarried row and single column marquee tool.
Click and hold on the Marquee Tool in the toolbar to reveal the unmarried row and single cavalcade marquees. For this, I'll use the unmarried column marquee.
Creating a new layer at the pinnacle of the layer stack, click on your canvas, and position the marquee selection along a vertical row of the template.
With your selection active, ready your foreground colour to white and press Option + Delete (Mac) or Alt + Delete (PC) to make full your selection with white.

Press Command + D (Mac) or Command + D (PC) to deselect afterwards you're finished.
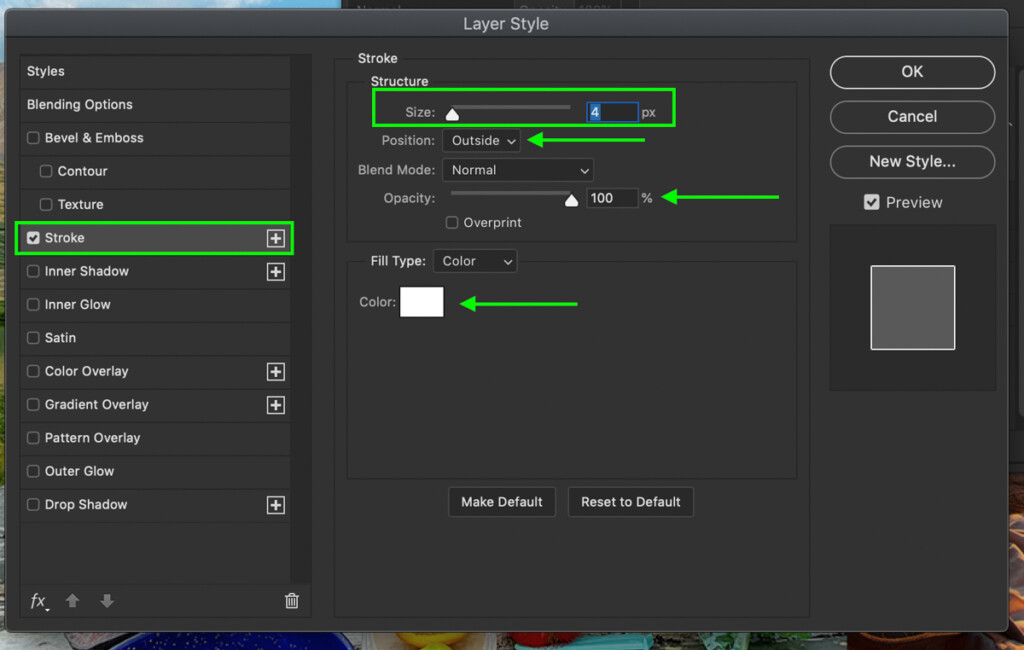
At this bespeak, the line will appear extremely sparse. To beef it upwards a trivial, double click on your layer to reveal the layer styles options. Select Stroke, prepare the colour to white, and adjust the size accordingly. This is one of the easiest means to speedily thicken the line between rows!

To speed up the process, you can duplicate this line to use again for your additional rows. With the line layer selected, grab the movement tool (V), concord Alt or Pick (PC/Mac), and click and elevate out from your line to duplicate it. Reposition this second line appropriately with another column.
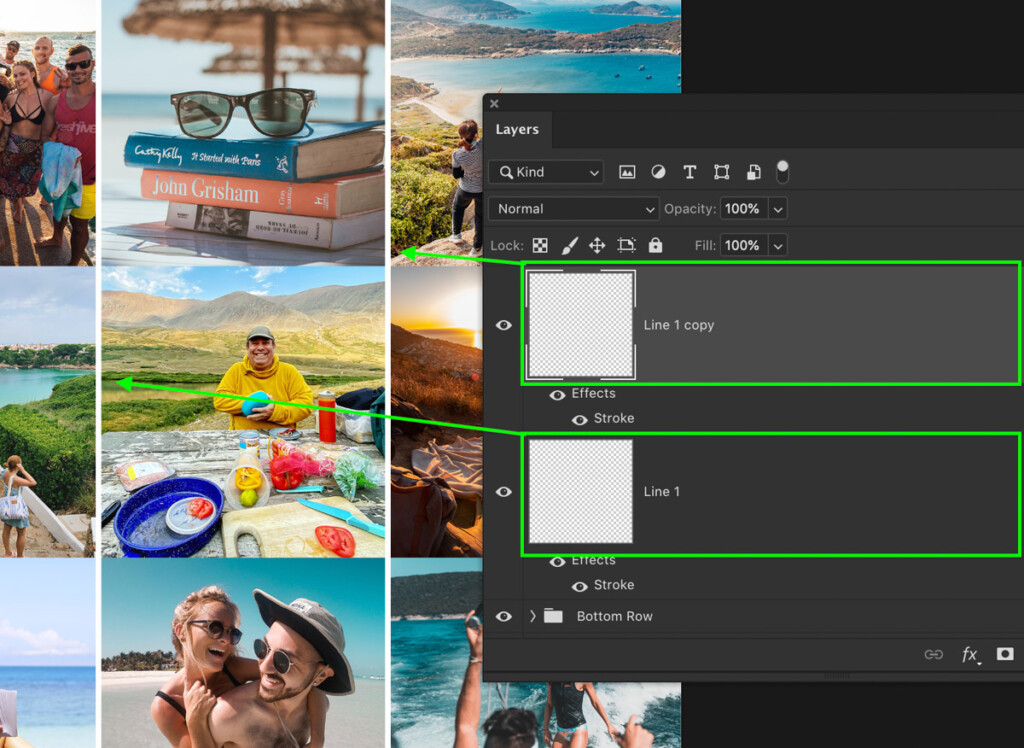
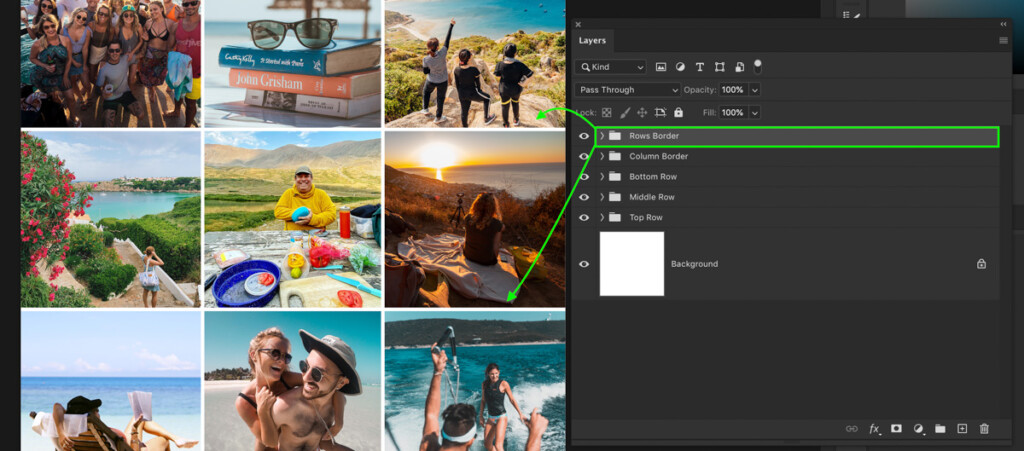
With ii new line layers created, shift-click between the top and bottom lines and printing Command + Yard (Mac) or Control + G (PC) to group them. Rename this group to "Column Border."
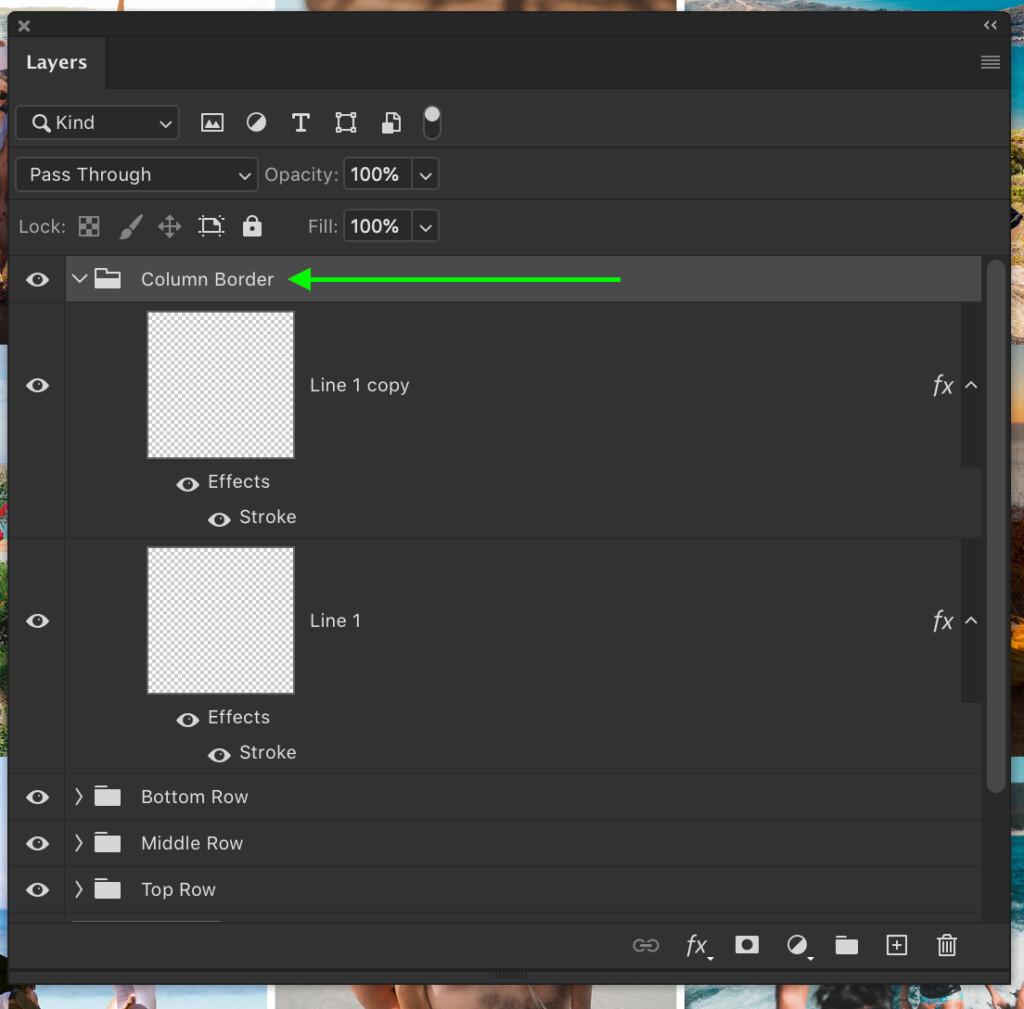
To make life piece of cake for the rows, duplicate the column group by pressing Command + J (Mac) or Control + J (PC). Select the move tool by pressing5and rotate the column borders until they align with the rows of your collage. One time done, rename this group to "Rows Border."
– Outlining Your Entire Collage With A Colored Edge
To take it one step further, you can also add an outline to your entire collage template. Dissimilar some of the other steps so far, this can be washed with just a couple of clicks.
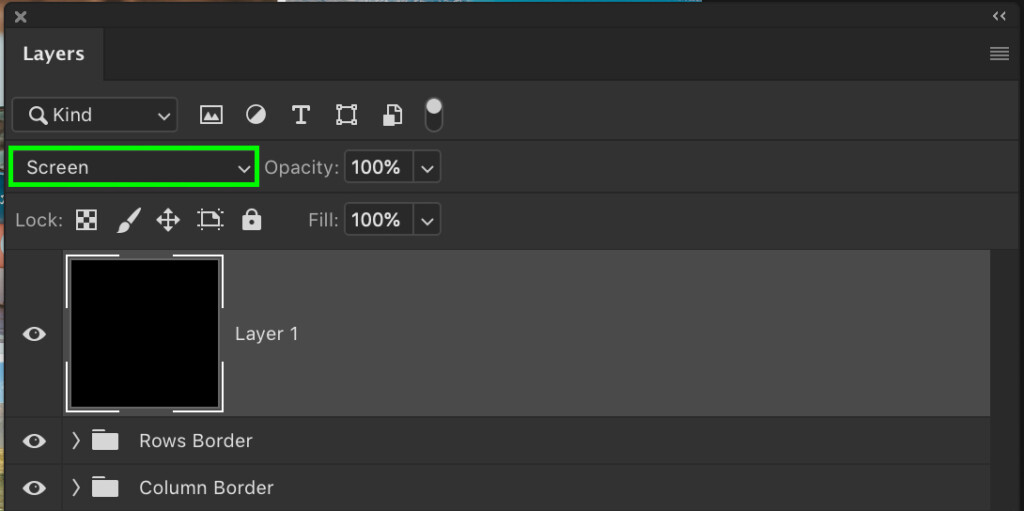
Create a new layer at the top of your layer stack and ready your foreground colour to black. Make full this new layer with black by pressing Pick + Delete (Mac) or Alt + Delete (PC).

Alter your layer blending manner from Normal to Screen to brand all of the black transparent.
Side by side, double click on your layer to open the layer styles option. Select the Stroke option, set the position to inside, choose the colour, and adjust the size of your stroke. Click OK when you're happy with the consequence.

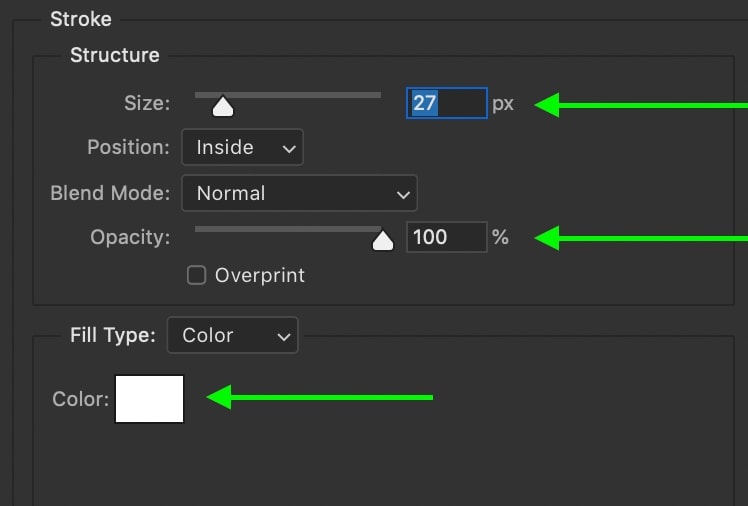
Now you'll have a colored outline around the edges of your collage that adds a nice looking effect to your template!

Step 5: Saving Your Collage Template As A PSD File
At this point, y'all've successfully made a collage in Photoshop that is ready to be exported and shared. The beauty of post-obit the steps in this tutorial is now you're left with a collage template that you tin can utilise for the rest of time.
All that's left is to save your template!
To outset the process, go upward to File > Save Equally.
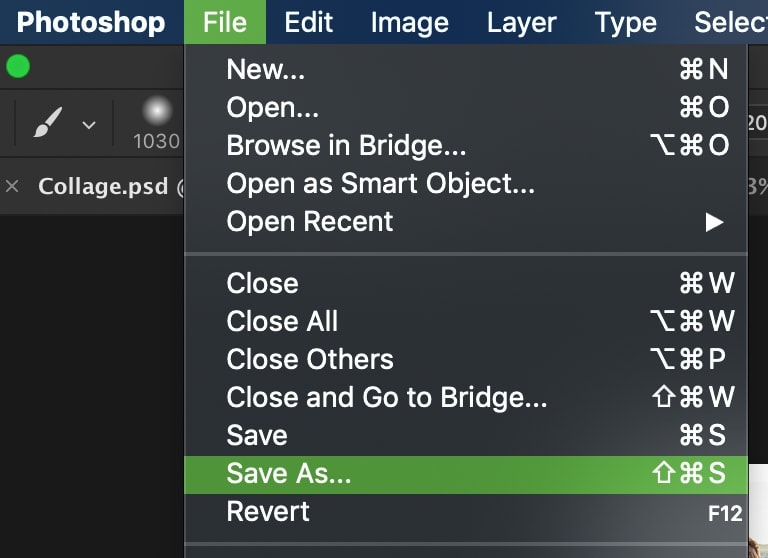
Side by side, rename your file and select a save location on your calculator.

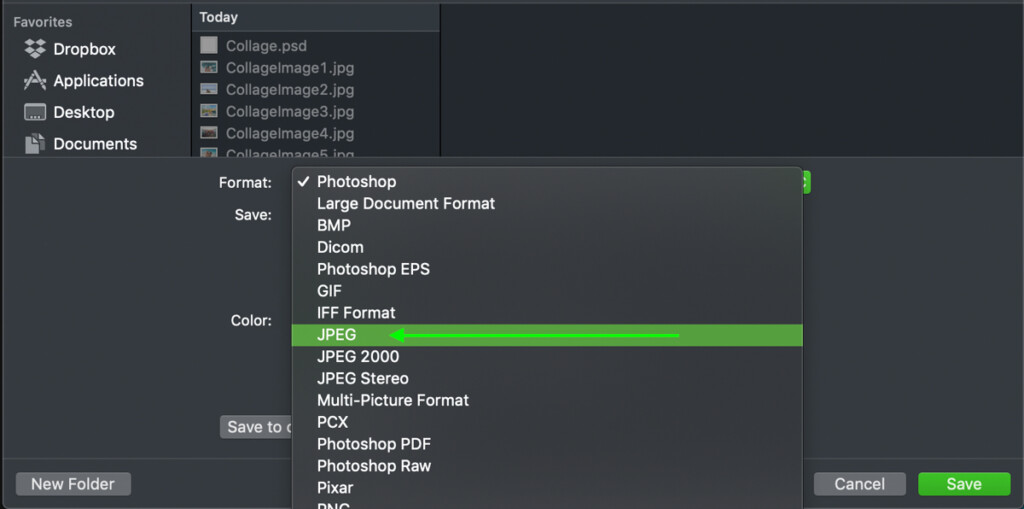
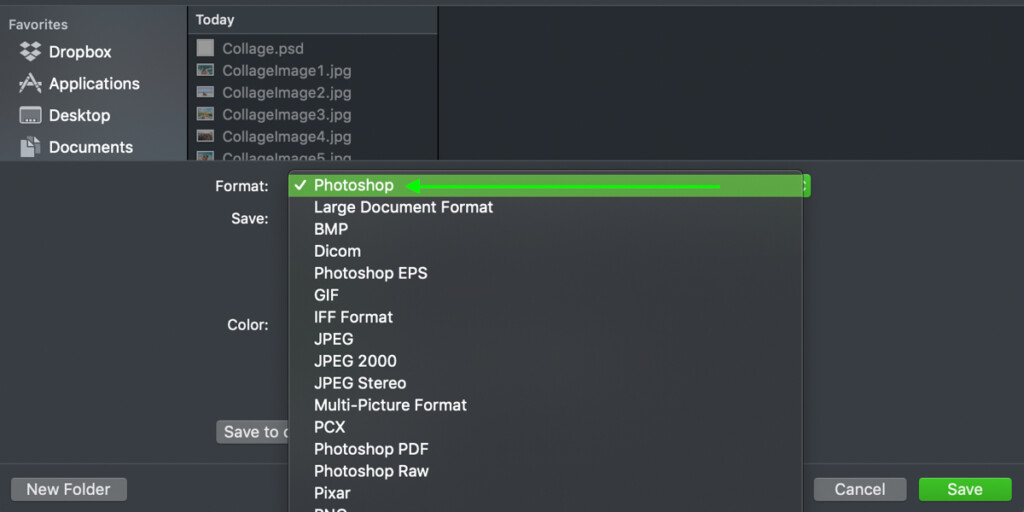
At present for the of import part. Depending on whether you want to consign your collage to share, or save your collage as a template, the file format you cull will exist different.
To save your collage as a shareable photograph, set the format to JPEG.
If you lot desire to create a collage template for time to come apply, set up the format to Photoshop. This will save your image every bit a Photoshop file that tin can be reopened afterwards on with complete access to all your files! You can learn more about PSD files and how they work in this mail.
Click Save, and your Photoshop collage template is complete!

Become Access To 5 Costless Collage Templates For Photoshop
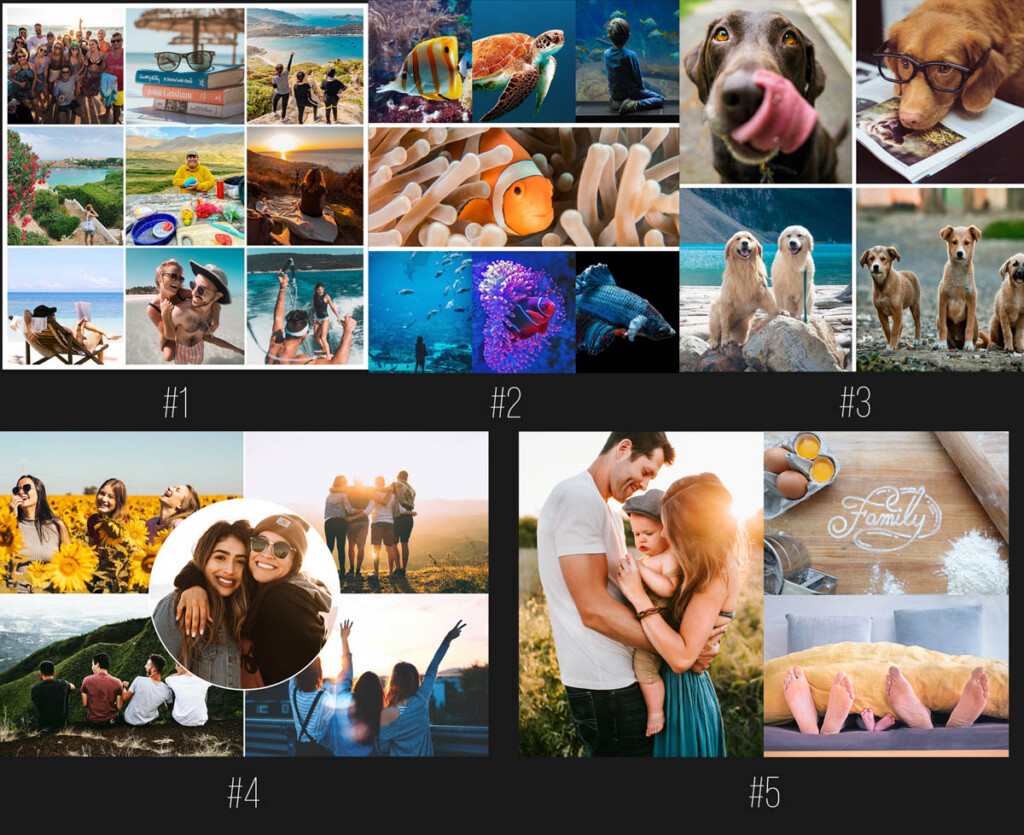
Depending on how fancy y'all want to become your Photoshop collage, y'all might end up spending more than time than you'd like. To assist yous salve heaps of time, be sure to download these 5 Free Collage Templates For Photoshop.
This template pack includes the verbal template I merely created in this tutorial, as well as four additional templates to spice things upwards. Above highlights the look of all five of these gratis collage templates!
Click Hither To Access These 5 Free Templates!
At present that you know how to make a collage in Photoshop, you lot can start getting creative with how y'all display your pictures online. Whether y'all want to share something on social media or print an image to hang on your wall, this method gets the job washed with ease.
Happy Collaging!
– Brendan 🙂

How To Creat Psd Templates Easily,
Source: https://www.bwillcreative.com/how-to-make-a-collage-template-in-photoshop/
Posted by: smithknorted.blogspot.com
0 Response to "How To Creat Psd Templates Easily"
Post a Comment